
Over the course of our hobby, I'm sure we've all considered utilising a cheap, common wallpaper pasting table for gaming. The thought has crossed my mind several times over the years but I've always discarded the idea, the tables are too long and narrow and pretty unstable but suddenly one day I had a brainwave, now I'm not sure if anybody else has had the same thought or even already built a table like this but it's a fresh idea to me so have look at what I've been up to.
I'm sure many of you share my problem of having too little space for a real gaming set up, especially a permanent table with any thickness for landscaping. As I mentioned, I used a pasting table but anyone with a solid set of woodworking skills could adapt the idea to make a board with different dimensions. I however have fairly rudimentary woodworking skills and an old pasting table otherwise gathering dust. My table is intended for Steam & Aether so covered in cobbles/paving but I should think it'd work well with grass or hills or whatever you like.
The idea is to actually build the board on the inside of the table, thus protecting it once it's folded away also I'm changing the edge that the table folds along making a nice square surface, it's hard to explain so I hope I make sense, here come the pictures.
Here's what I did on the first day of building......

Take one ordinary pasting table.

It opens like this, pretty useless....

Still, open it flat and carfully remove the legs.

Now remove the hinges.

Now turn the halves 90deg and put the hinges on, this time on the other edge (I drilled guide holes using the hinge as a template).

Next take the legs and cut them down to fit the inside width to use as braces (the fibreboard surface is pretty flimsy!)

Now with white glue underneath and screws in each end through the frame, fix the bracing.

I found some more wood to brace with in the shed and used the off cuts of the legs to make cross bracing. Make sure your extra braces are the same thickness as the legs or it will cause problems later.

Next using guide holes drilled from the other side I used little screws to fix the bracing securely to the board. There's no real depth to the fibreboard for countersinking so the next step is pretty essential.

I got two cheap foamed sleeping mats for camping and glued them to the board. This covers the screwheads and protects the board. It'll also protect the board from slipping off of where ever you lay it.

Here's it finished, the edges were fixed down with superglue.

And here it is folded again.

And weighted with heavy books to help the gluing (I actually added more and distributed them more evenly).

Next comes the infill, I used really cheap polystyrene packing sheets to build the bulk of the board. Some areas have been left shallow as I want to add scenic elements below the regular playing surface, you could carve a river or trenches or whatever you like (allowing for bracing).

Next the surface layers of blue styrofoam are built up. If you plan better you might only need one layer.
I forgot to photograph between stages here but in the picture I have used a plane, chisels and belt sander to reduce the height of the two lengths of wood that form the internal section of the frame. When I add the next layer of styrofoam they should be fairly flush with the playing surface, only needing a little work to disguise (that's the plan at least!)

For added stability at the edges I've inserted short lengths of cut down cocktail stick, the theory is that they should help reduce the compression that could occur from knocks or leaning players!

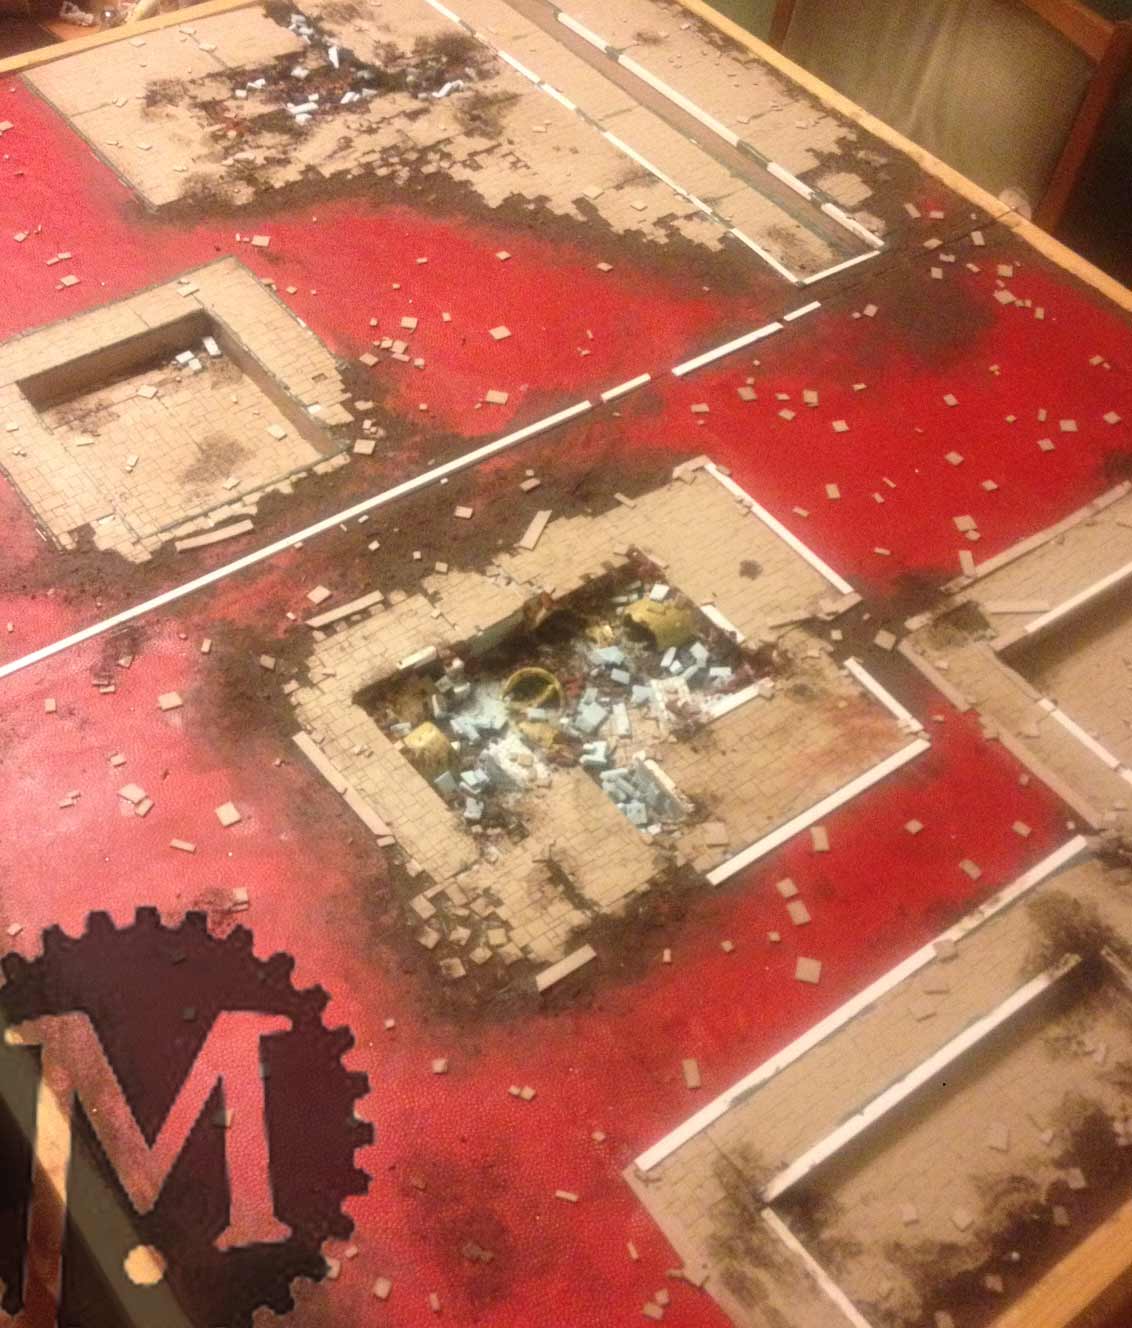
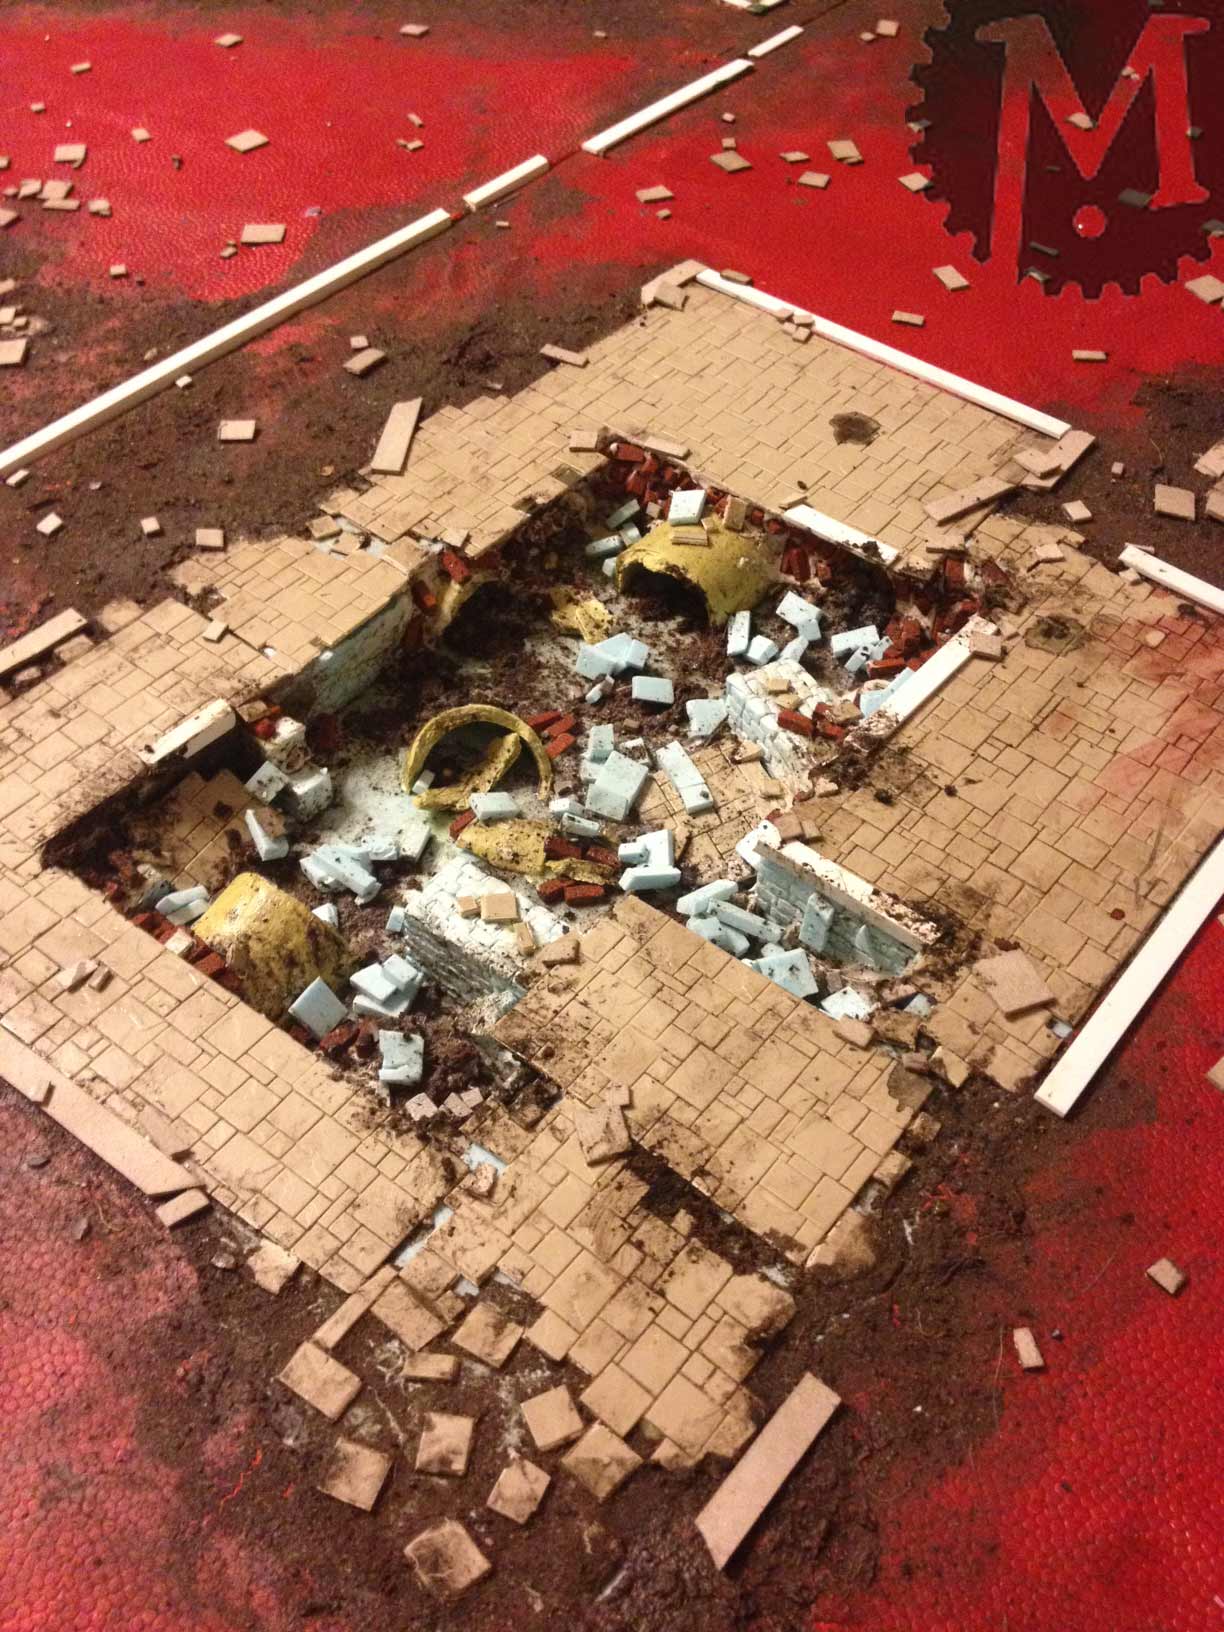
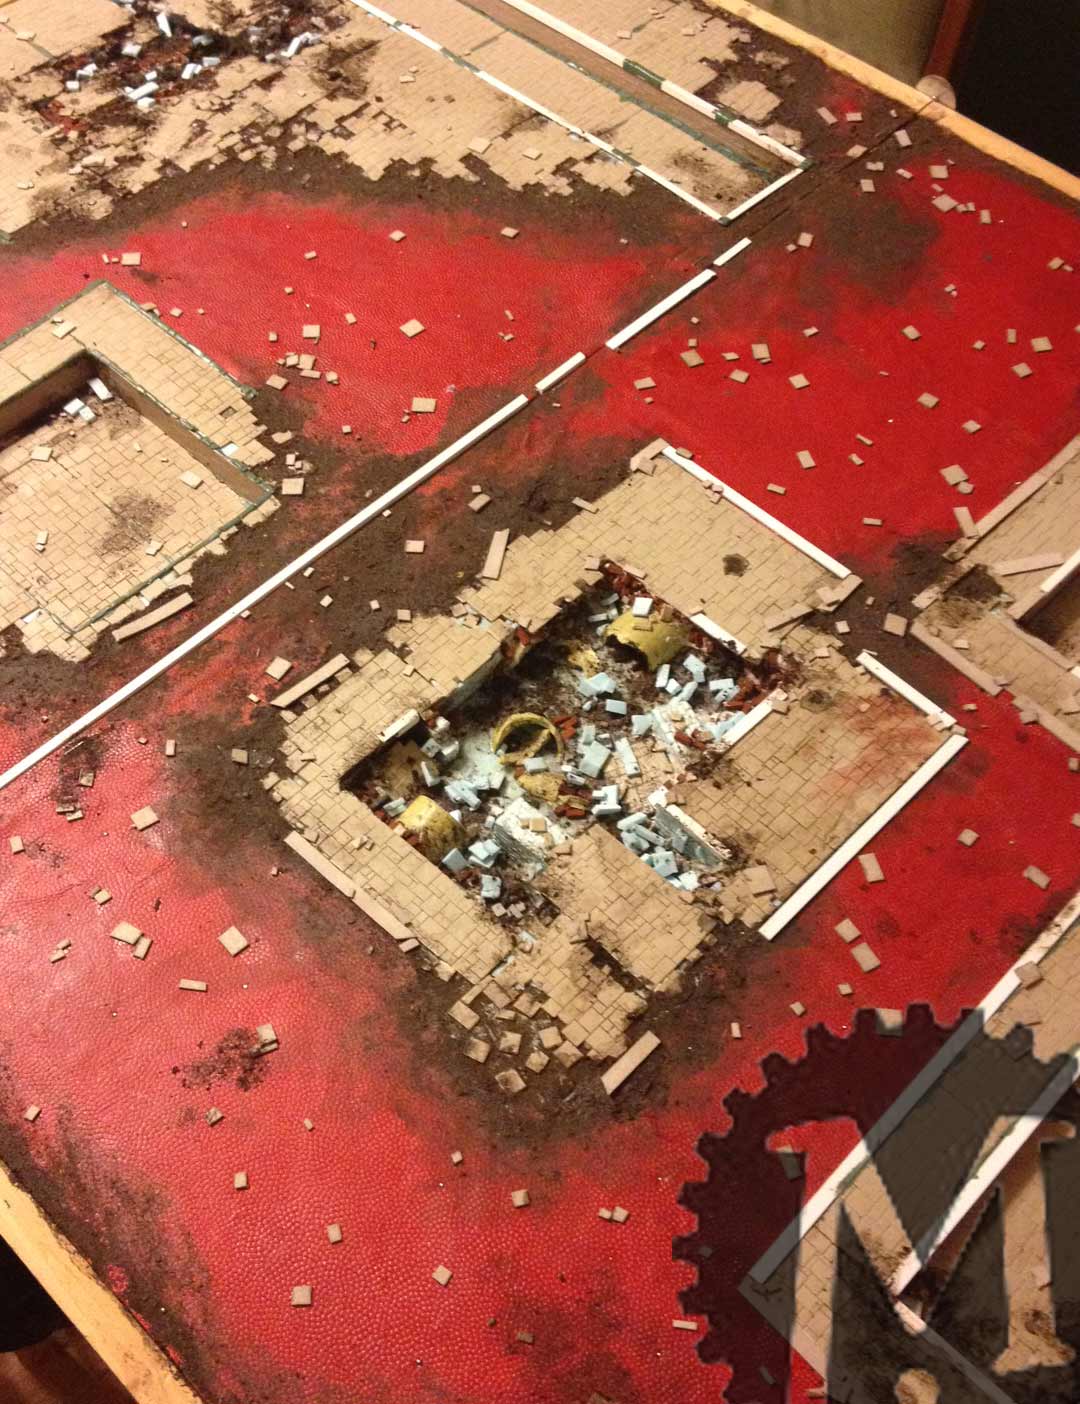
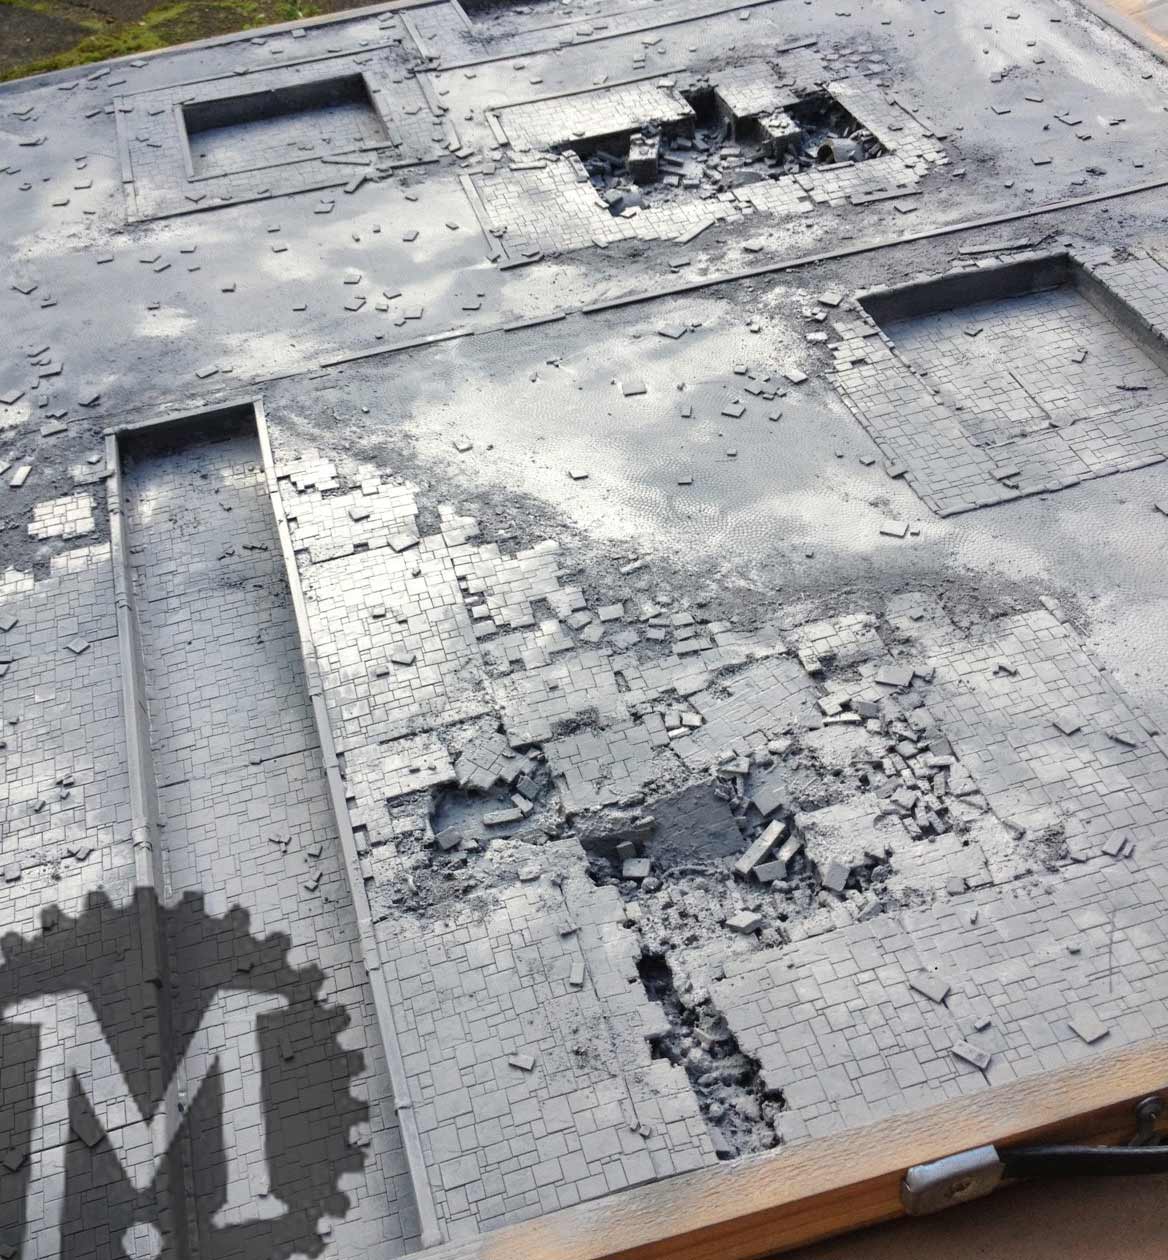
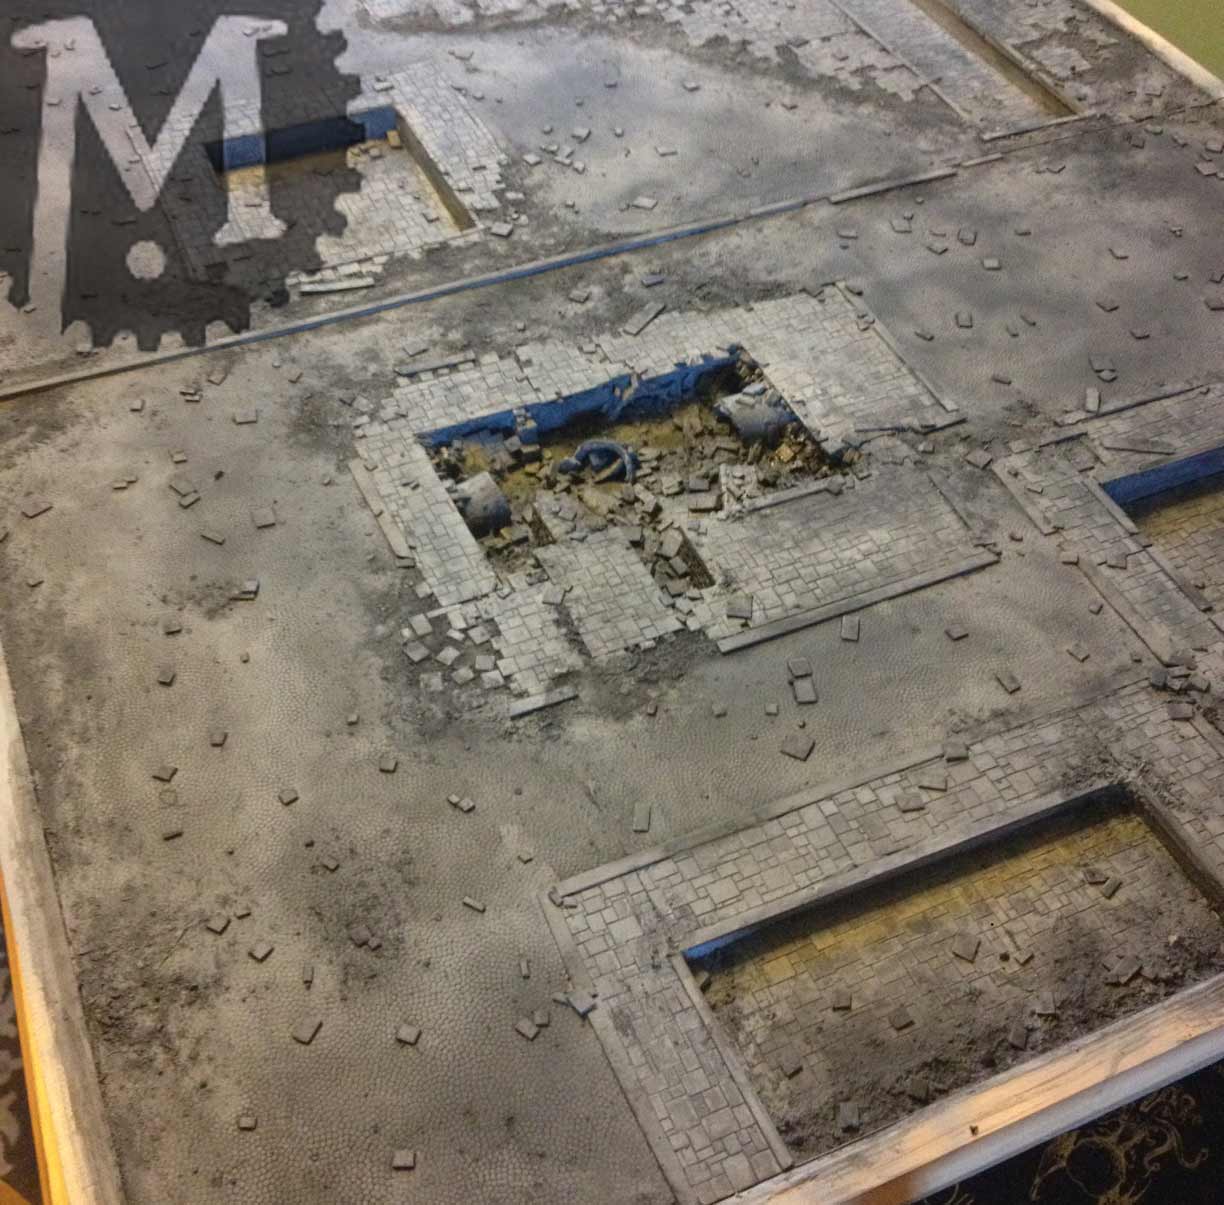
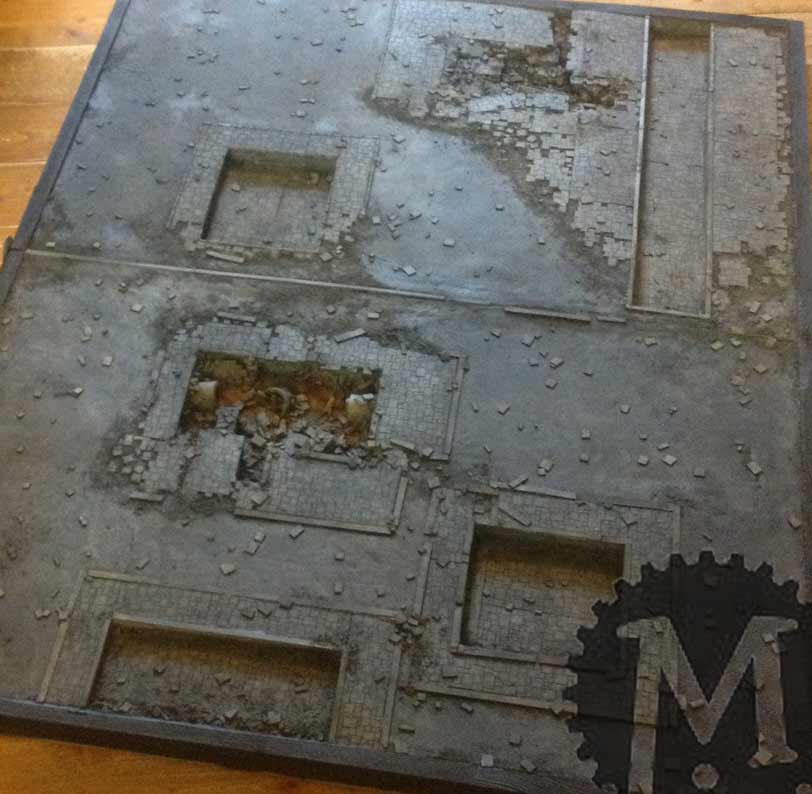
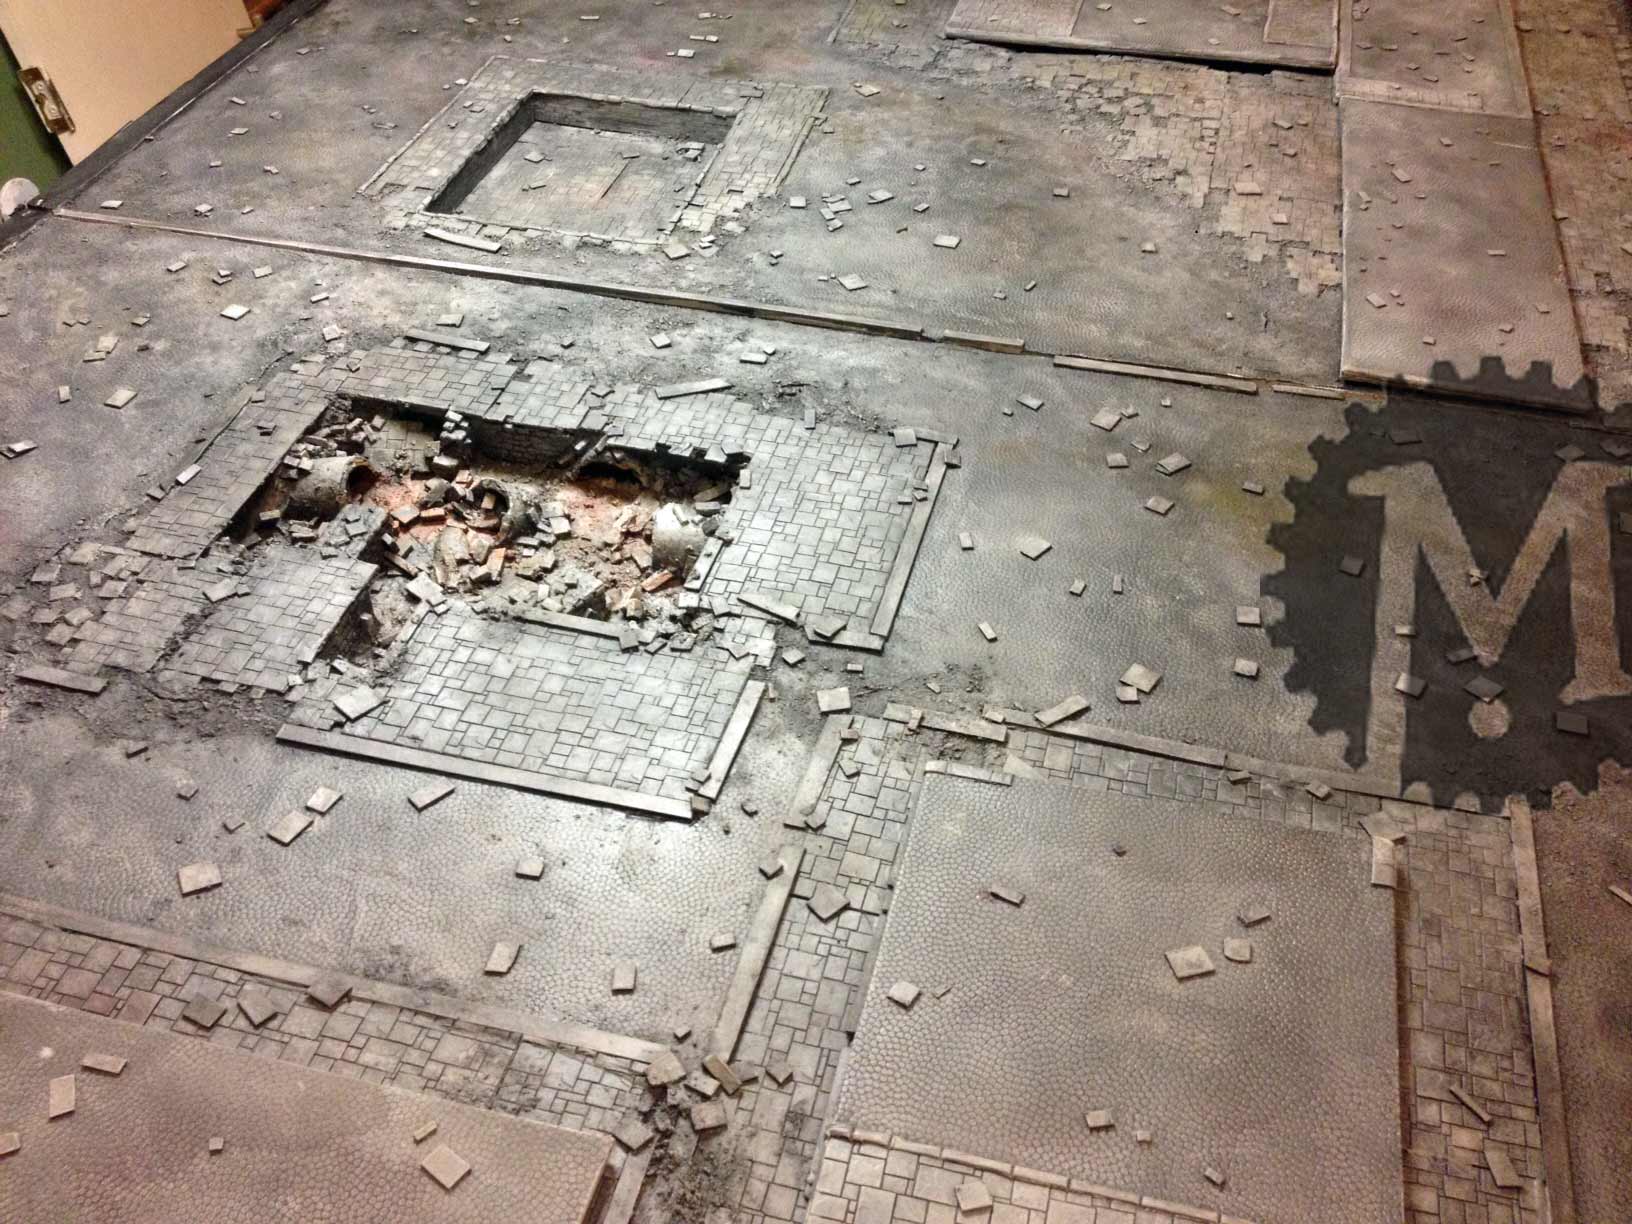
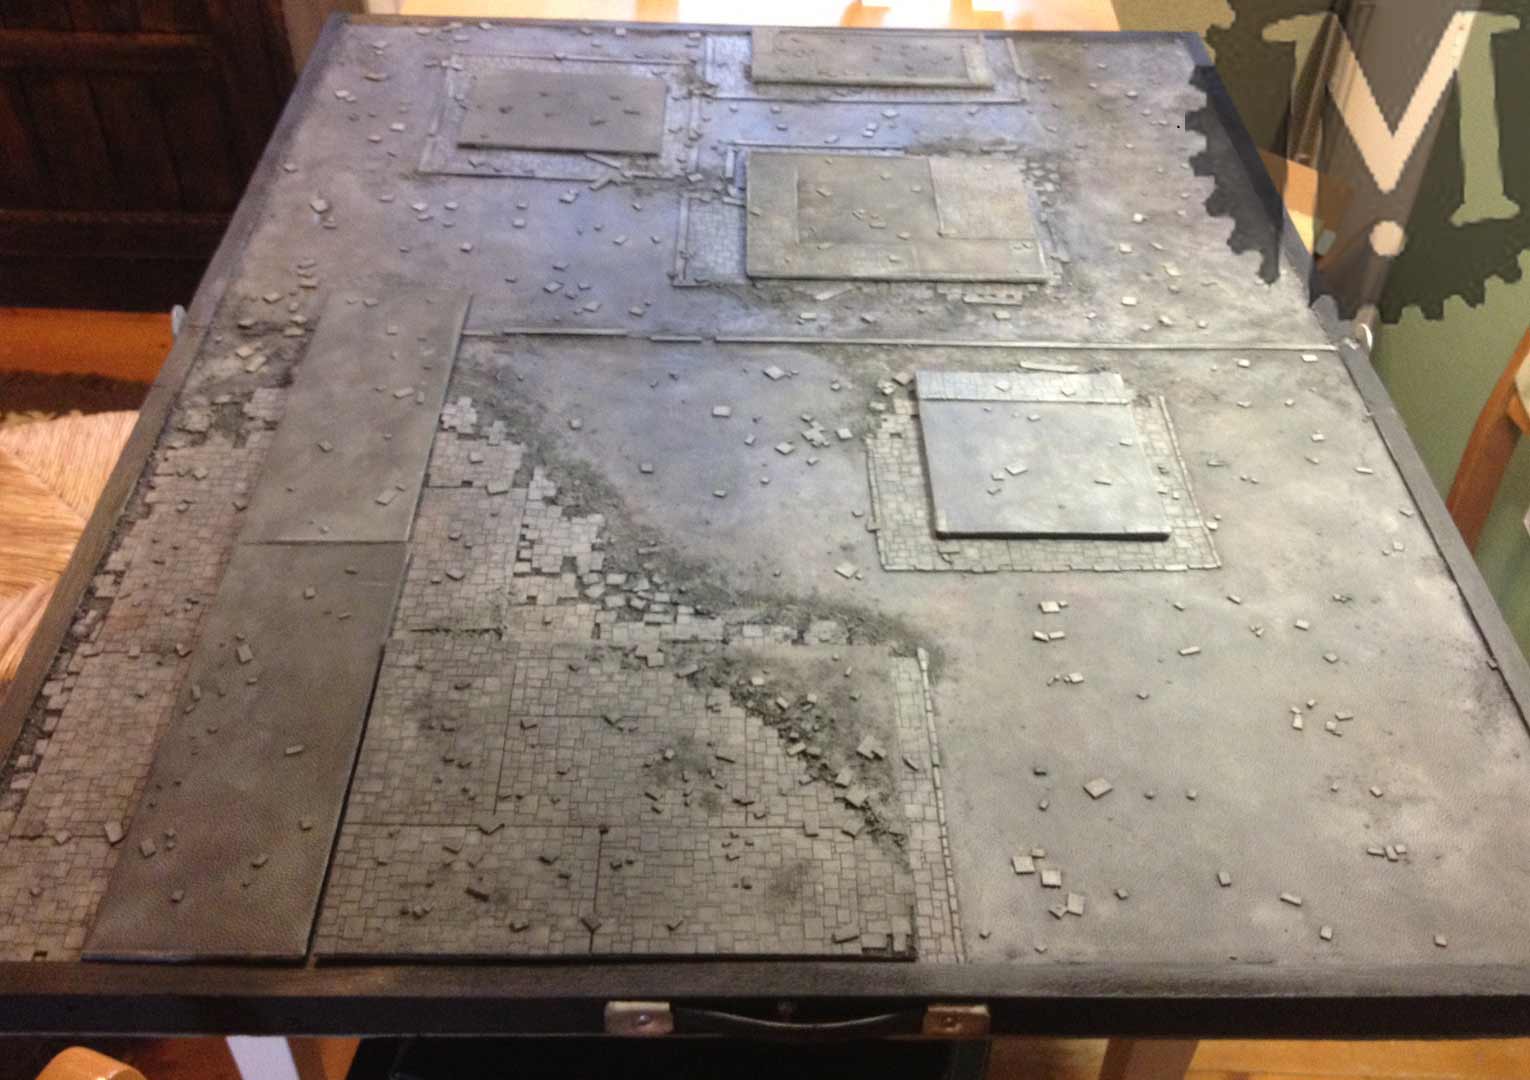
The last layer of styrofoam went on and to my relief is pretty flush with the internal frame edges (the filler isn't as caked on as it looks, it's filler is B&Q brand flexible filler to try to avoid cracking.) All of the paved areas are Wills plastic sheets and there's some other dressed stone plastic sheeting on the walls that I picked up from 4D models but didn't notice the brand name.
You can't see well in the photos but one recess is the collapsed basement and one is a sewer (it looks a bit like it is purposely open rather than collapsed but it will look better painted).
Next up I've got some basketball textured fabric to make cobbles, loads of putty work to blend and edge the paving and some grit to glue on!

The red area is suede "basketball" textured fabric, it looks just like cobbles when it's painted. I glued it down with a thin layer of PVA, there may be a better adhesive solution however as I had a lot of annoyance with it wrinkling unevenly when it absorbed the moisture. A coat of thinned glue to seal it and a few hours in the sun got it tight as a drum again. The brown areas are dry soil, collected from the garden and sieved to remove pebbles etc. Again I used PVA to glue and seal it, brused at the edges to feather it out a bit.


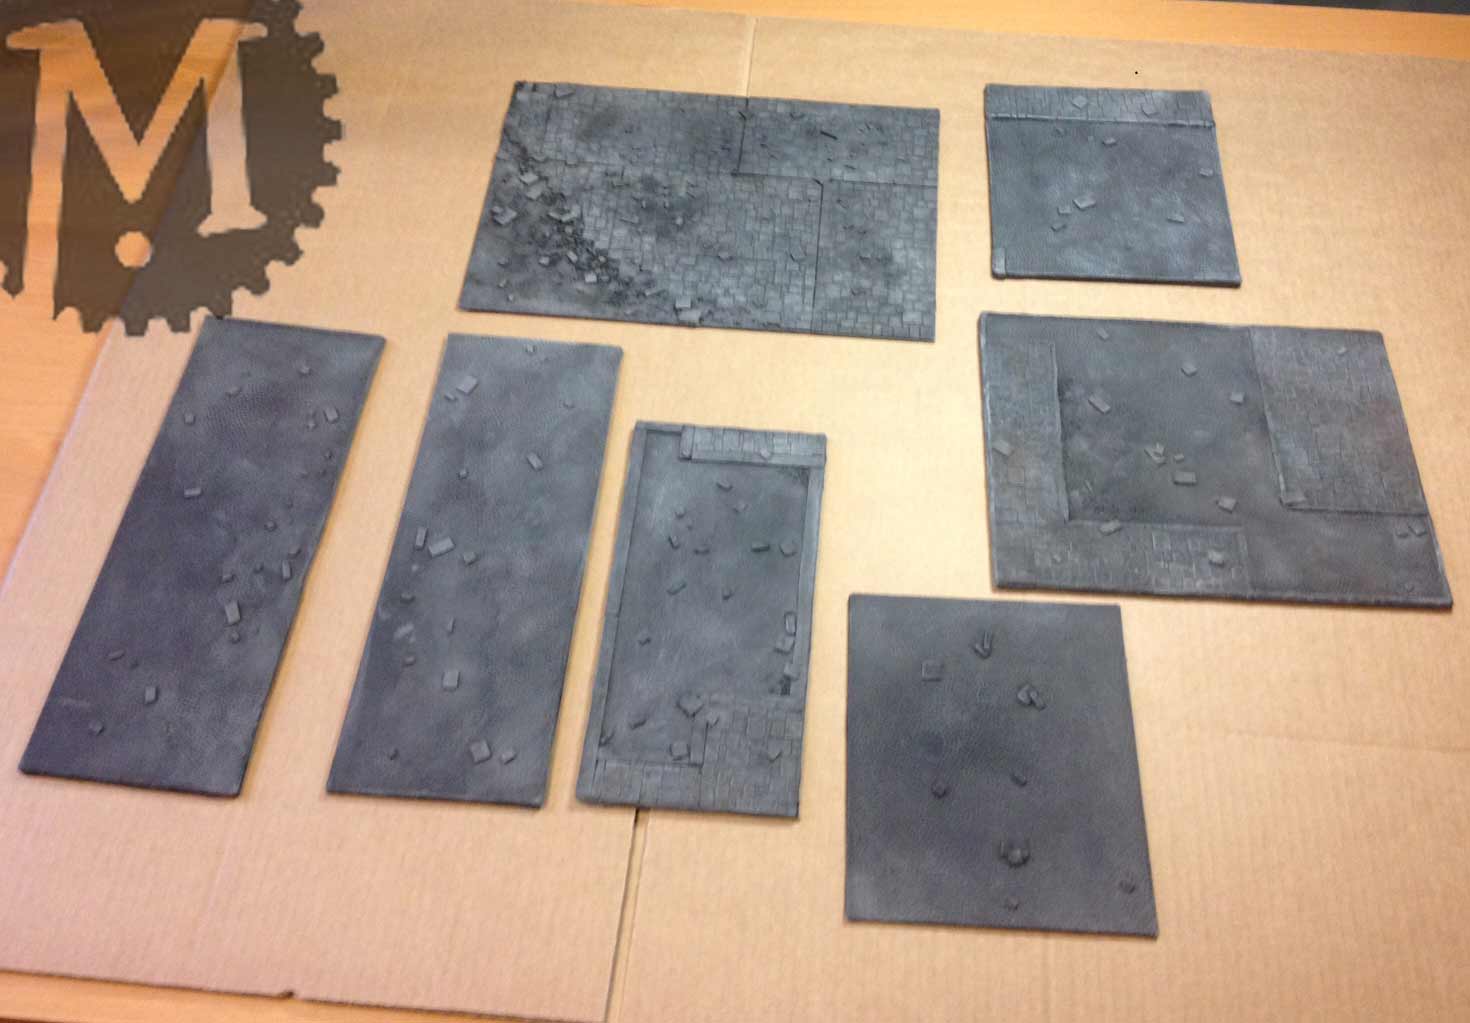
And now for the "baffles" 2mm plasticard that will be covered with the same textures as the board to eliminate the built in terrain features, to give more flexibility for gaming as you can see below:
| |||||


Neat idea and the result looks great.
ReplyDeleteMy only concerns building a board like this would be:
a) If the insides rubbed together when it's closed. Not fitting the foam all the way to the top would help off set this though.
b) If the handle is strong enough to cope when moving the board around
c) The board is not very wide for 28mm figures with ranged weapons. I see a possible issue in manuvering around unless you have lots of ruins or buildings sticking up to give cover.
I will be interested to see how the flexible filler lasts. I have used wood filler previously to coat small foam items the were subject to bending slightly.
Not sure if you know but it's very hard to comment on your blog due to a quirk/feature in blogger (since at least 2012) in safari and chrome. Not sure if setting the comments option to full page still fixes it as I no longer use Blogger myself...
There's actually plenty of breathing space foe the surfaces as I planed down the centre but left the edges with a good couple of mm so there's no rubbing.
DeleteThe handle is fine but not too comfortable!
There will be lots and lots of cover as I get building :)
Sorry you're having problems commenting!
Wow, amazing work. This will work beautifully with your miniature line.
ReplyDelete(I haven't had any troubles commenting BTW).
Thanks :)
DeleteI'd like to know more about the 'basketball fabric'. Where did you get that? What material is it? Does it have a different name?
ReplyDeleteI got it on Ebay, the material is "suede" it's hard to use but looks gret when finished.
ReplyDeleteCheers!
Found some on eBay as well, it is great! Thank you for this tip, I've bought a lot of the stuff.
ReplyDeleteNow we're going to copy the rest of your work. :)